Bardzo dziękujemy.
“Rosa Romantica” -Fractures II
Witajcie ! Dzisiaj kontynuujemy szycie “fractur” bardzo się starałam dokumentować każdy etap pracy nad tym quiltem. A więc do dzieła.
Hello again! Today we will be continuing working on my “fractures” piece, I tried to do the best I could to document each stage of this project. So, let’s get to work.
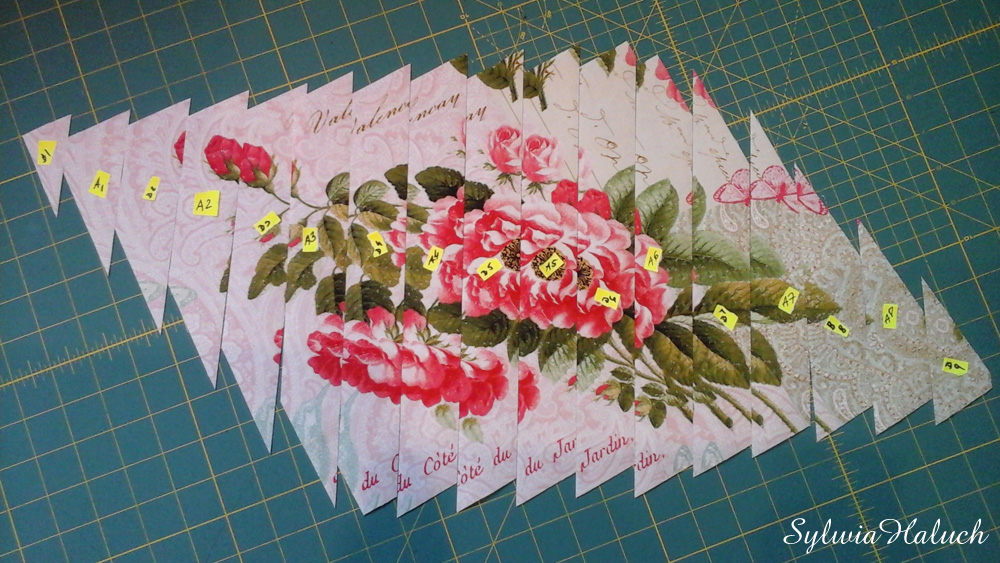
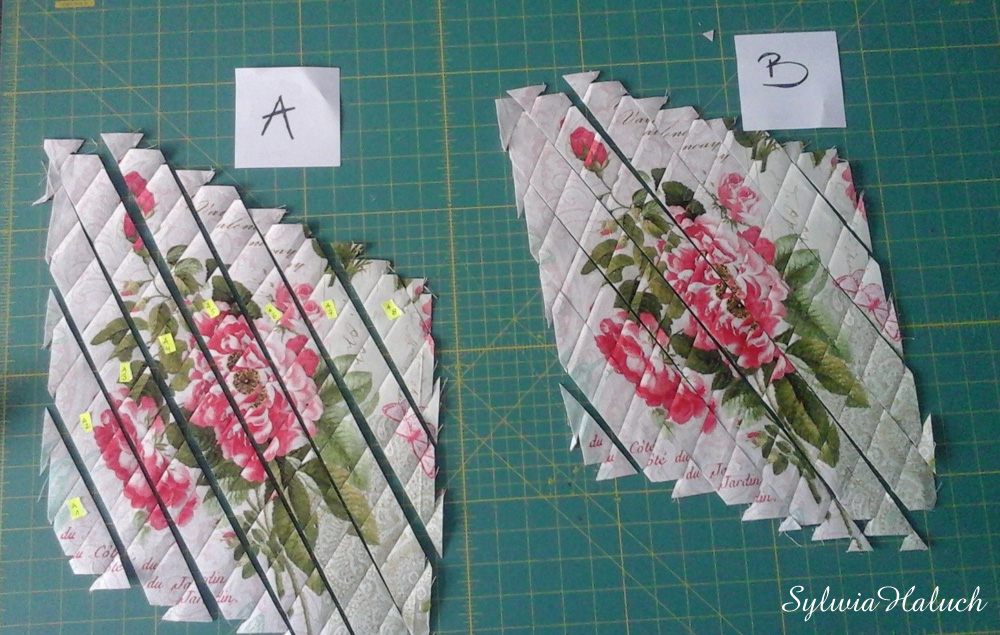
Dwa penele A tniemy pod kątem 60˚ zaczynając od lewego rogu, od lewej do prawej, na paski 1,5” . Znaczymy je A1, A2, A3….
Two panels, which I will call “A,” were cut starting from the bottom left-hand corner and angled at 60 degrees to the right. These I cut into 1.5” strips. Working from left to right, I labeled the strips A1, A2, A3, and so on.
Dwa panele B tniemy pod kątem 60˚, ale początkowy punkt cięcia przesuwamy o ¾” od lewego dolnego rogu. Pierwszy paseczek ma rozmiar ¾ “ który wyrzucamy a resztę tniemy na paski 1,5”. Znaczymy je B1, B2, B3….
We have two other panels, which I will call “B,” that need to be cut at 60 ˚ in a similar way with one difference. In the “B” panels the starting point is ¾” away from the bottom left-hand corner. The first piece that is cut is ¾” wide. Throw it away. Continue with the same pattern as we did on the “A” panels and slice the rest of the “B” panels into 1.5” strips.
Paski obu paneli A oznaczamy od lewej do prawej A1, A2, A3 itd.
Working from left to right, the cut pieces from panel “A” are labeled A1, A2, A3, etc.
Paski obu paneli B oznaczamy od lewej do prawej B1, B2, B3 itd.
Working from the left to right, the cut pieces from panel “B” are labeled B1, B2, B3, etc.
Układamy paski panelu A i B według kolejności A1, B1, A2, B2, A3, B3 itd.
Ponieważ cięłam paski mając panele odwrócone lewą stroną do góry moja kolejność była trochę inna czyli B1, A1, B2, A2, ale to nie zmieniło wzoru.
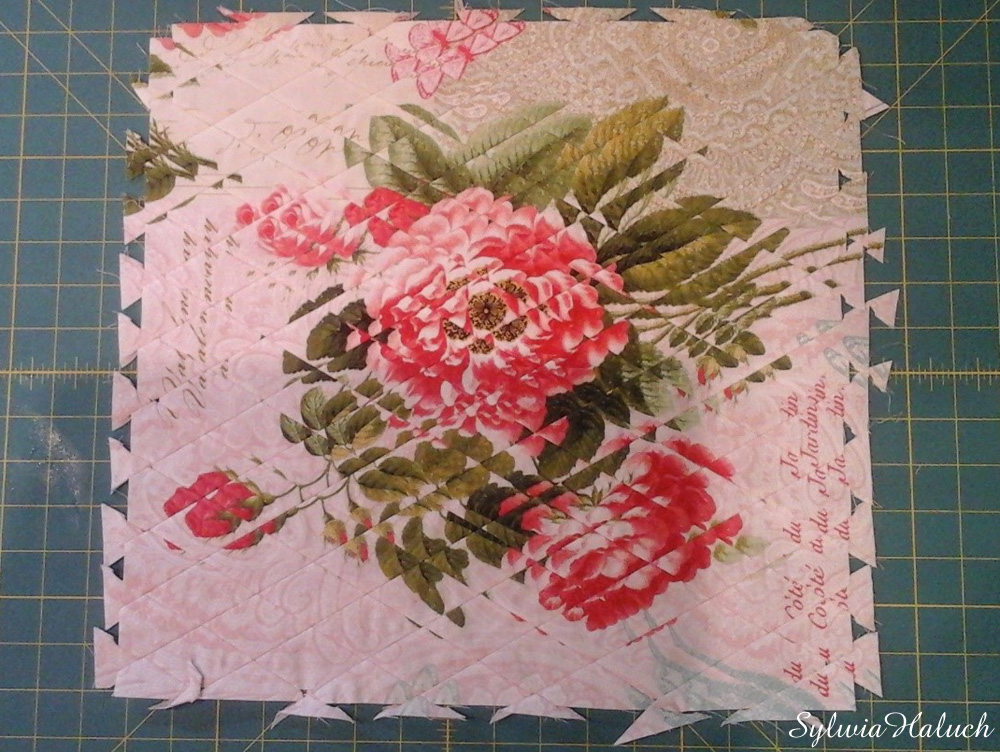
Tak wygląda przód układanki.
We can arrange the panels together following the pattern of A1, B1, A2, B2, A3, B3, etc. I cut the strips having the panels upside down so my pattern was slightly different, B1, A1, B2, A2. This didn’t change the design.
This is how it looks arranged together.
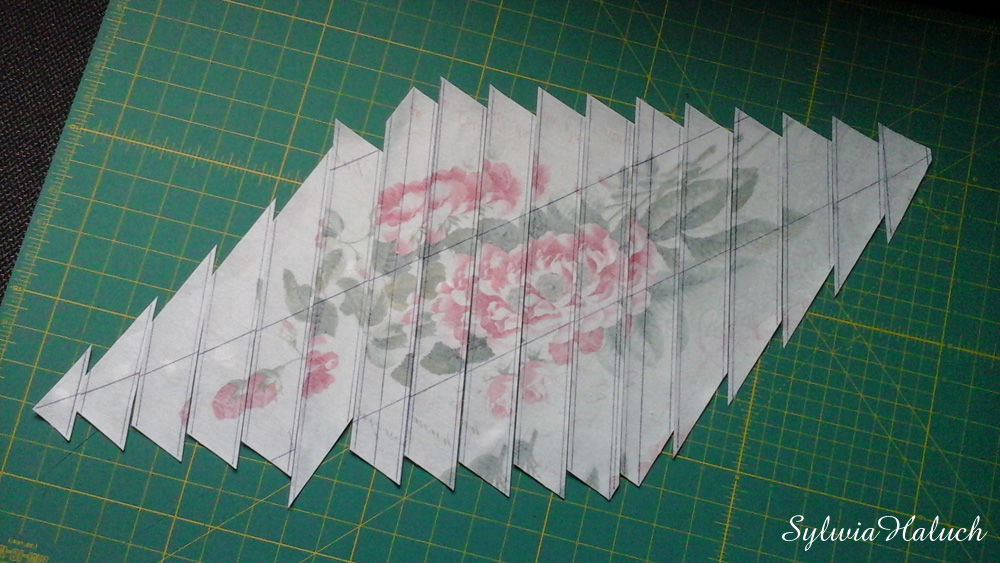
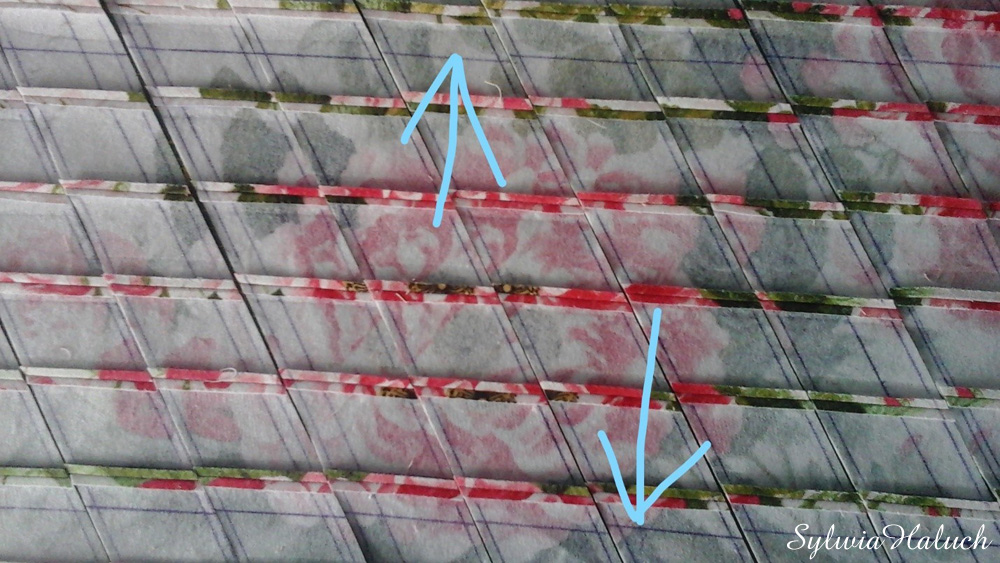
A tak wygląda spód układanki.
And here is the back.
Teraz widać do czego były potrzebne linie pomocnicze. Według tych równoległych linii zszywamy paski.
Here you can see what the guidelines were for. The strips are sown together according to the lines.
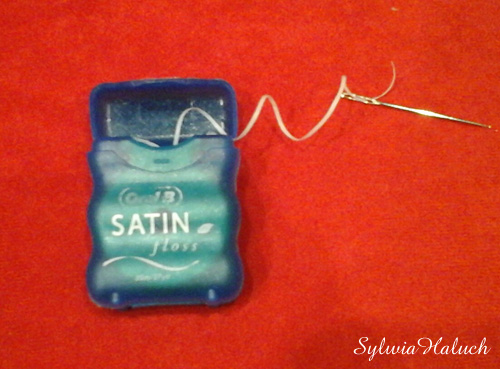
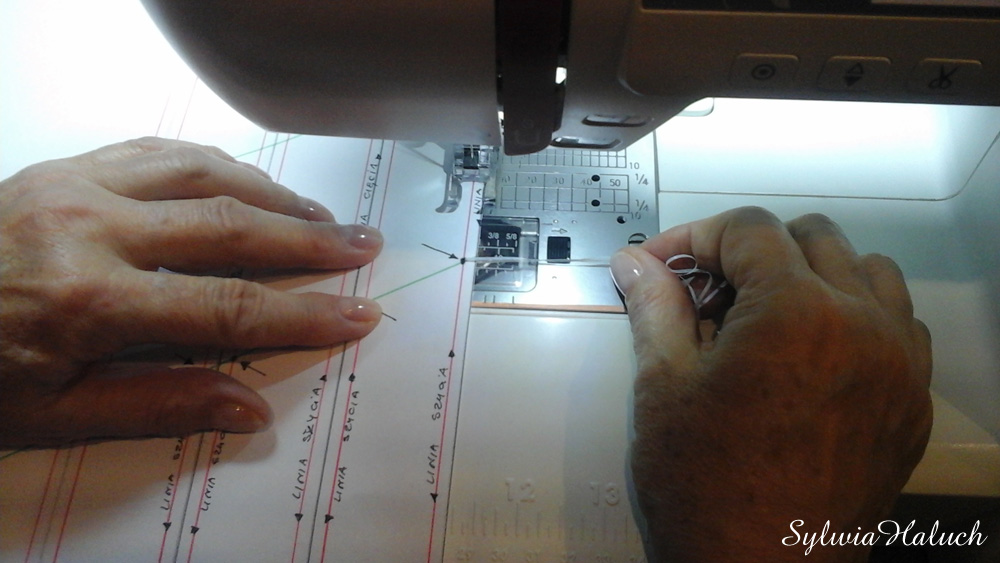
A oto mój sekret. Narzędzia dzięki którym uzyskałam prawie 100% precyzji. Nie pamiętam nazwiska tego pana który pokazuje tę technikę ale z pewnością pan ten zasługuje na Nagrodę Nobla w kategorii szycia quiltow.
Here are my secret tools. Thanks to this I achieved almost 100% precision. I do not remember the name of the man who shared this technique with others, but he certainly deserves the Nobel Prize in the sewing category.
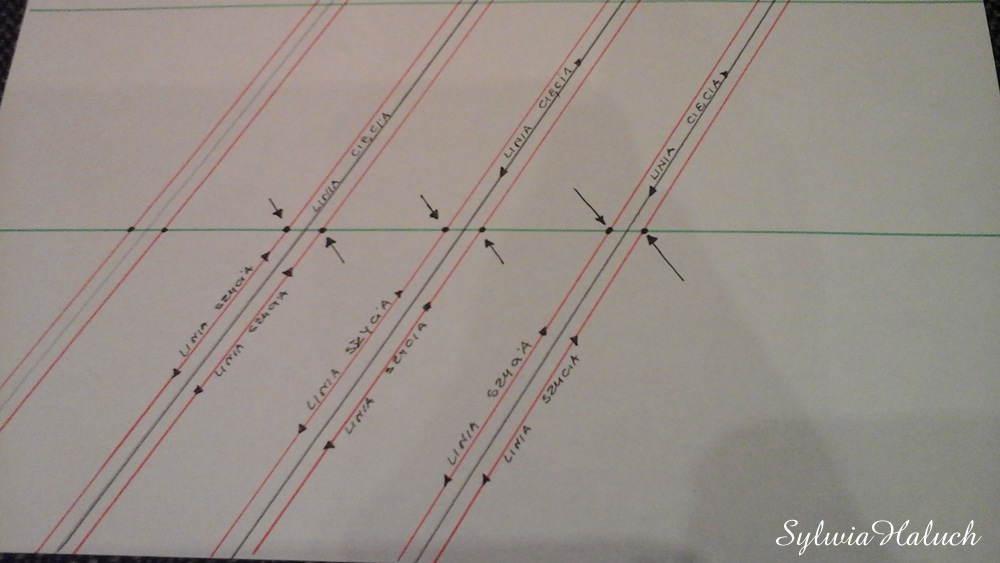
Rozrysowałam to na kartce żeby było bardziej widoczne co robiłam. Czarna linia to linia cięcia, czerwona to linia szycia. Przez zaznaczone kropką punkty przeciągamy nitkę do zębów łącząc sąsiednie paski.
I drew this method out on a sheet of paper to make it clearer. Through the marked points we drag the needle with dental floss, connecting the strips. The black line in the middle is the cutting line, the red is the sewing line.
I tak ustawione paski przeszywamy na maszynie razem z nitką do zębów, która nie uszkodzi igły.
The strips are sewn together on the machine using the dental floss, the floss won’t damage the needle.
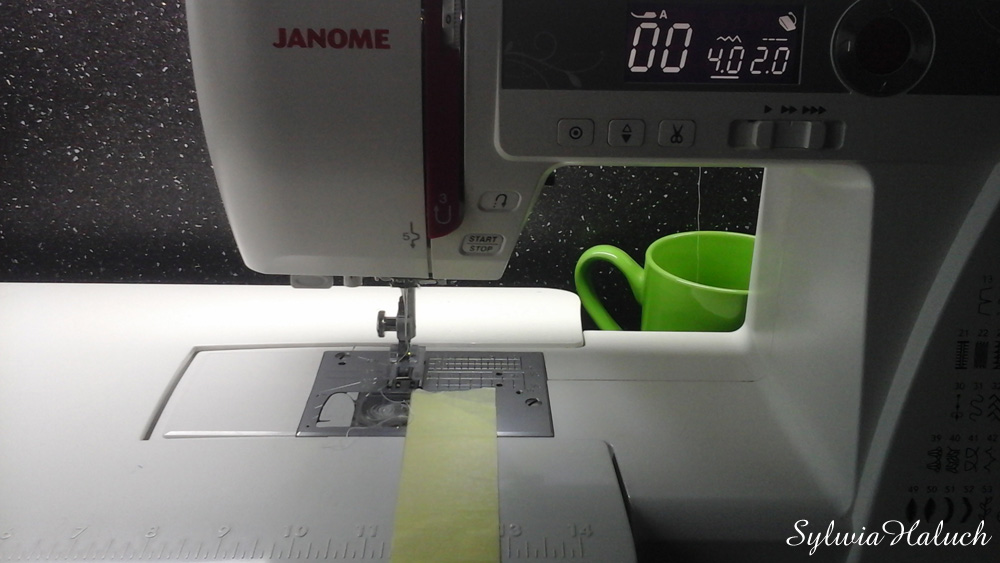
I tu jest kolejne wyzwanie. Szew 1/8 cala. Ideałem byłoby wbudowanie w maszyne GPS do szwów i wydanie polecenia …1/8 cala, szyj prosto 😊….. w marzeniach. A oto mój patent, jeśli ktoś ma inny czekam na wiadomość.
Here is the next challenge: a 1/8” seam. Ideally, the sewing machine should come with GPS built in for seams and you can just tell it to sew a 1/8” seam that is perfectly straight. Only in my dreams. This is my patent if someone has a better idea please let me know.
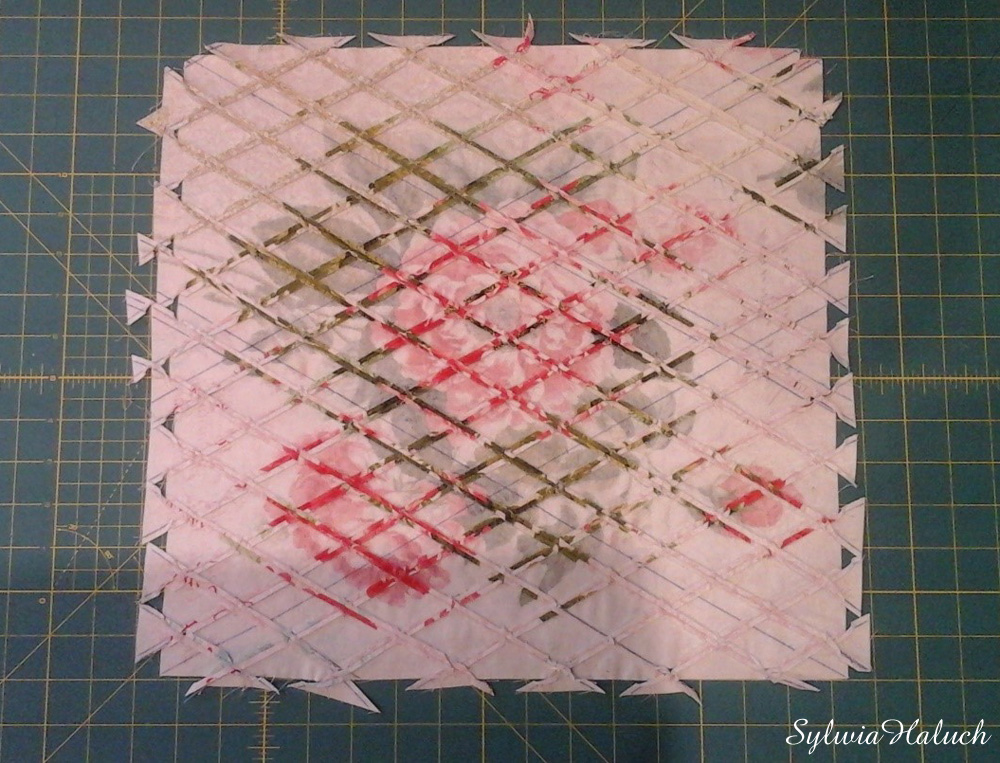
Po zeszyciu pasków tył panelu A i panelu B ma wygladać tak. Prasujemy szwy otwarte.
After the strips are sewn, the back of panel A and panel B should look like this. Press the seams open.
Otrzymałam wiec dwa panele A i B.
So, I got panel “A” and panel “B”
Panel A tniemy na 1,5 calowe paski pod kątem 60˚, stosując tę samą metodę jak poprzenio w panelu A, czyli zaczynajc od dolnego lewego roku. Numerujemy paski A1, A2, A3 itd.
Panel B tniemy na 1,5 paski pod kątem 60˚ zaczynąjc cięcie ¾ cala od lewego dolnego rogu. Numerujemy paski B1, B2, B3 itd.
Lets start working with the second set of panels “A” and “B”.
The second panel A is cut into 1,5” strips at 60 ˚angle using the same method as before with panel A that means we start cutting process from the left lower corner. We label them A1, A2, A3 etc.
The second panel panel B is cut into 1,5” strips at 60 ˚ angle using the same method as before with panel B that means the starting point is 3/4 “away from the left lower corner. We label them B1, B2, B3 etc.
Układamy paski od lewej do prawej A1, B1, A2, B2, A3, B3 itd. Zszywamy paski stosując ten sam sekret z nitką do zębów, który opisałam w poprzednim opowiadaniu. Tu pokazuje ułożenie pasków według linii pomocniczych.
We arranged strips from left to right A1, B1, A2, B2 etc. and sew them together using the same trick I shared with you on previous post, using dental floss. Here you can see the guide lines being helpful again.
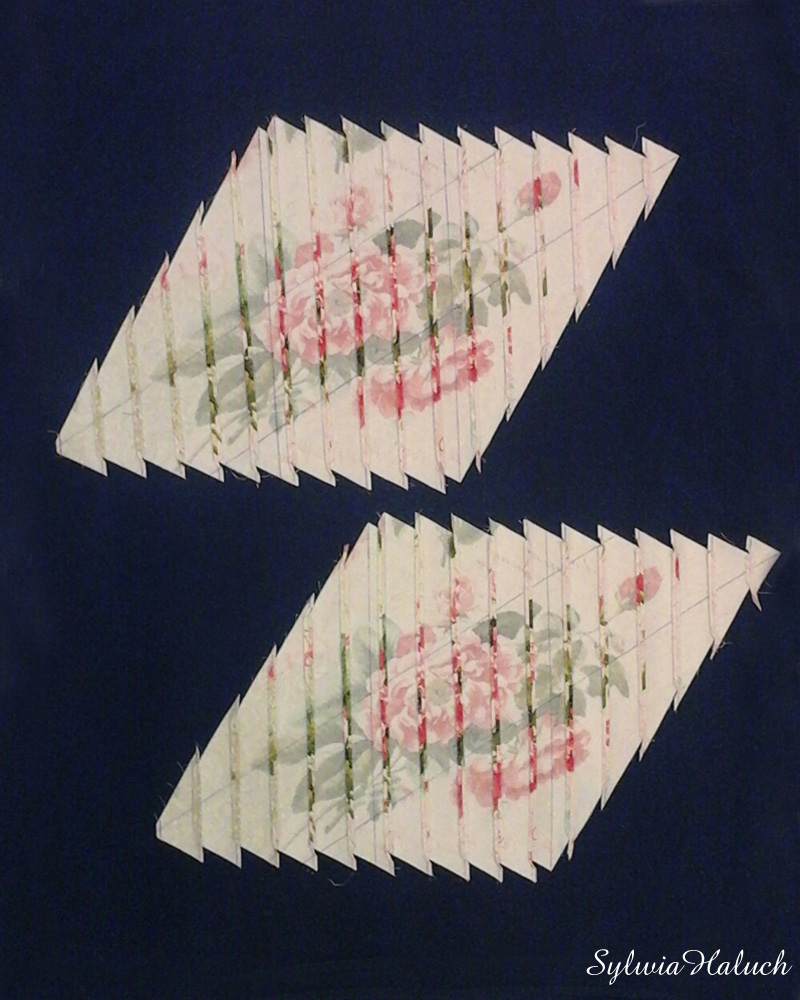
Przȯd uszytego panelu.
The face of the panel.
Plecki panelu. Szwy prasujemy otwarte.
The back of the panel. Press the seams open.
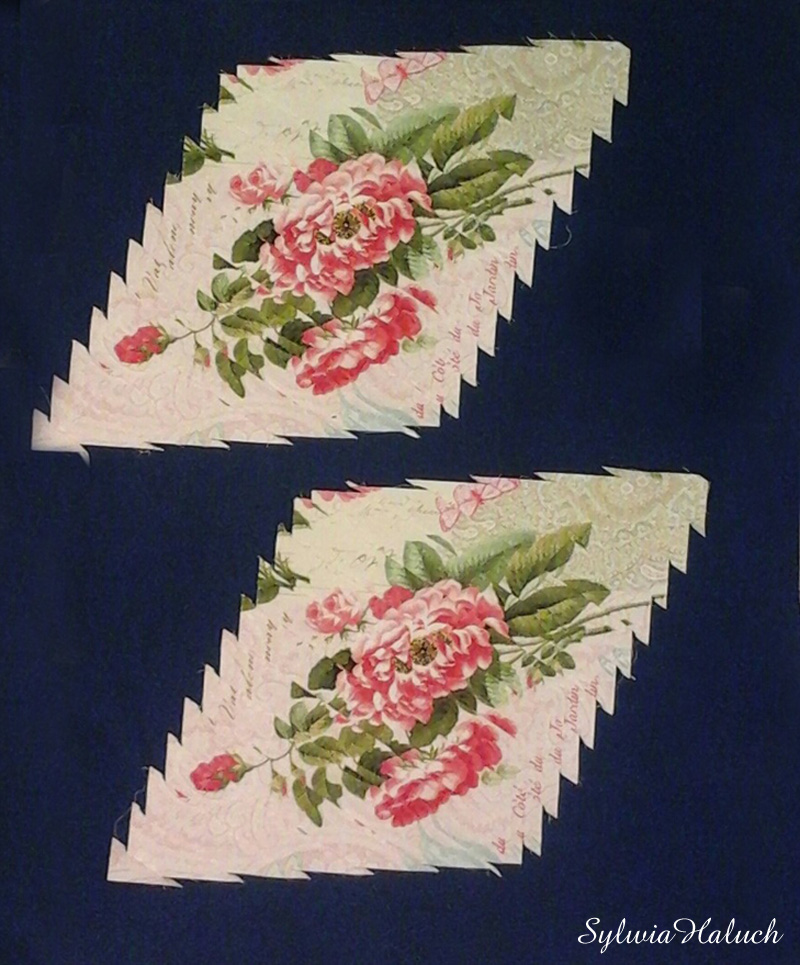
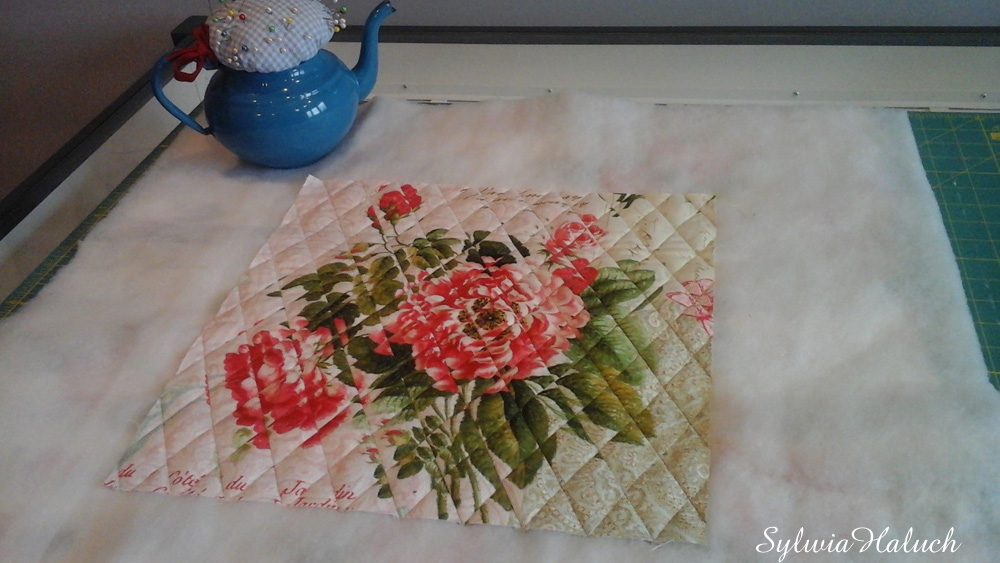
Docięłam i wypikowałam nitką nylonową wzdłuż linii przeszycia podkreślając romby.
I cut the sewn panel and stich in a ditch with polyester thread emphasizing nice diamond shapes.
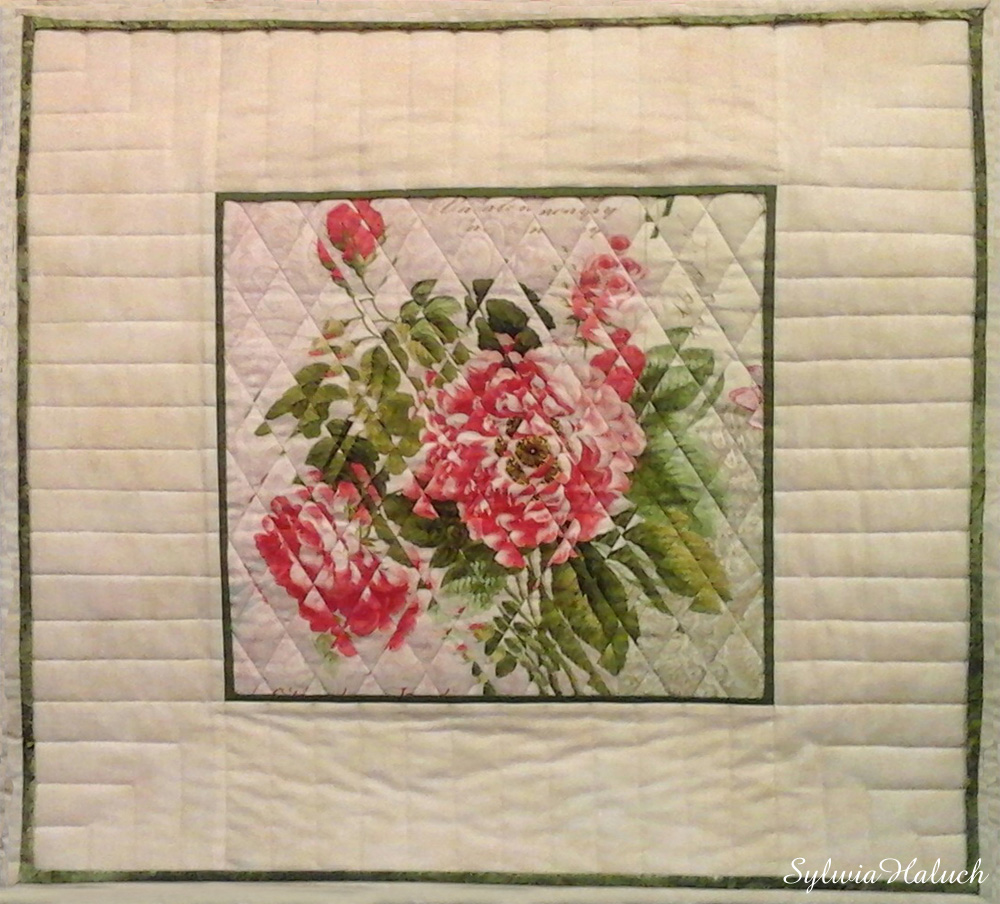
A oto moja “Rosa Romantica”, (60cmx60cm).
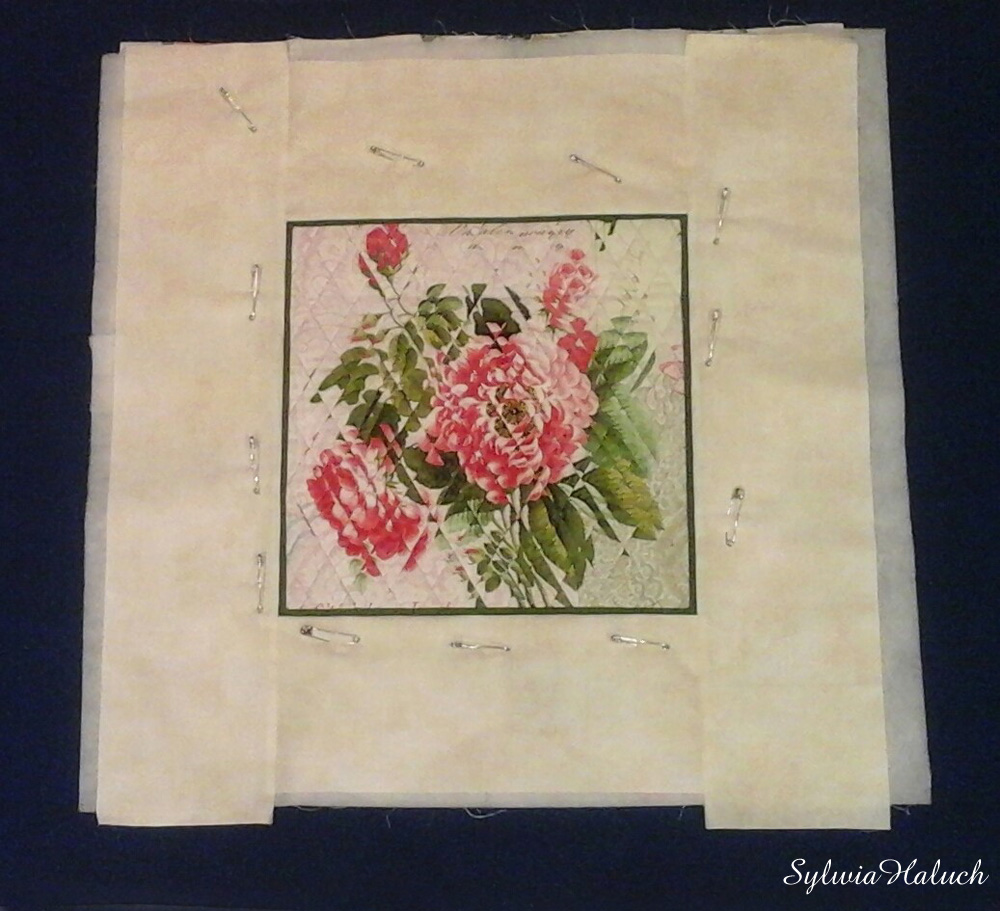
Opisałam najtrudniejszy etap pracy and tym quiltem. Następne czynności sądzę, że już nie wymagają tak szczegółowego opisywania. Uważam, że są to już decyzje szyjącego w jaki sposób wykończy swoja pracę. Moja “Rosa Romantica” pojechała na wystawę, tym razem wirtualną z powodu wirusowych obostrzeń.
Here is my finished “Rosa Romantica.” She measures 24”x24” (60cmx60cm) in size. I described the harder stage of working on this project. The few next steps do not need such a detailed description. I believe these will be creative decisions made by whoever is sewing on how to finish the piece. My “Rosa Romantica” went to an exhibition, but this time it was virtual because of corona-virus restrictions.
1 comment
Dodaj komentarz Anuluj pisanie odpowiedzi
Witryna wykorzystuje Akismet, aby ograniczyć spam. Dowiedz się więcej jak przetwarzane są dane komentarzy.
WIELKIE gratulacje Sylwia & Sylwia! Doskonały z Was duet! Prace piękne. Miejsce godne prezentacji właśnie takich prac. Pozdrawiam Was obie…
Jolciu, dziekuje za cieple slowa. W zegarze jest blisko 30 elementow, musialam wprowadzic zmiany w projekcie bo zgrubienia w jednym…
Tak Aniu, ostatnio jest to moja ulubiona technika. Mam w planach wiecej projektow.
Och, Sylwio! A to Ci niespodzianka! Pokazywałaś już ten projekt uszyty na FB, czy się mylę? No Ty! No! Nawet…



whoah this weblog is excellent i love reading your posts.
Stay up the great work! You already know, many persons are
searching around for this information, you could help them greatly.